The neuroimaging data viewer software FSLeyes is equipped with a few atlases – Harvard-Oxford Cortical Structural Atlas, Juelich Histological Atlas, MNI Structural Atlas, and the likes. It also allows its users to load and use custom atlases. Here’s a brief how-to post about how to add a new atlas to FSLeyes.
We will use the Johnson et al., 2019 Canine Brain atlas as an example. If you would like to know more about the atlas and how it was made, please refer to the original open access publication "Stereotactic Cortical Atlas of the Domestic Canine Brain" at this link.
Steps to add a new atlas to FSLeyes
step 1
Download the Canine brain atlas from this link.
step 2
Assuming you have downloaded it to the default Downloads folder, path to your Canine atlas will be ~/Downloads/Johnson_etal_2019_Canine_Atlas_v2. Notice that the folder is equipped with a few files. The ones relevant for us are:
Canine-labels-update.xml: the file that FSLeyes readsCanine_population_template.nii.gz: a template brain to visualise this atlaswhole_atlas_cortical_subcortical.nii.gz: allows you to visualise various cortical and subcortical regions
step 3
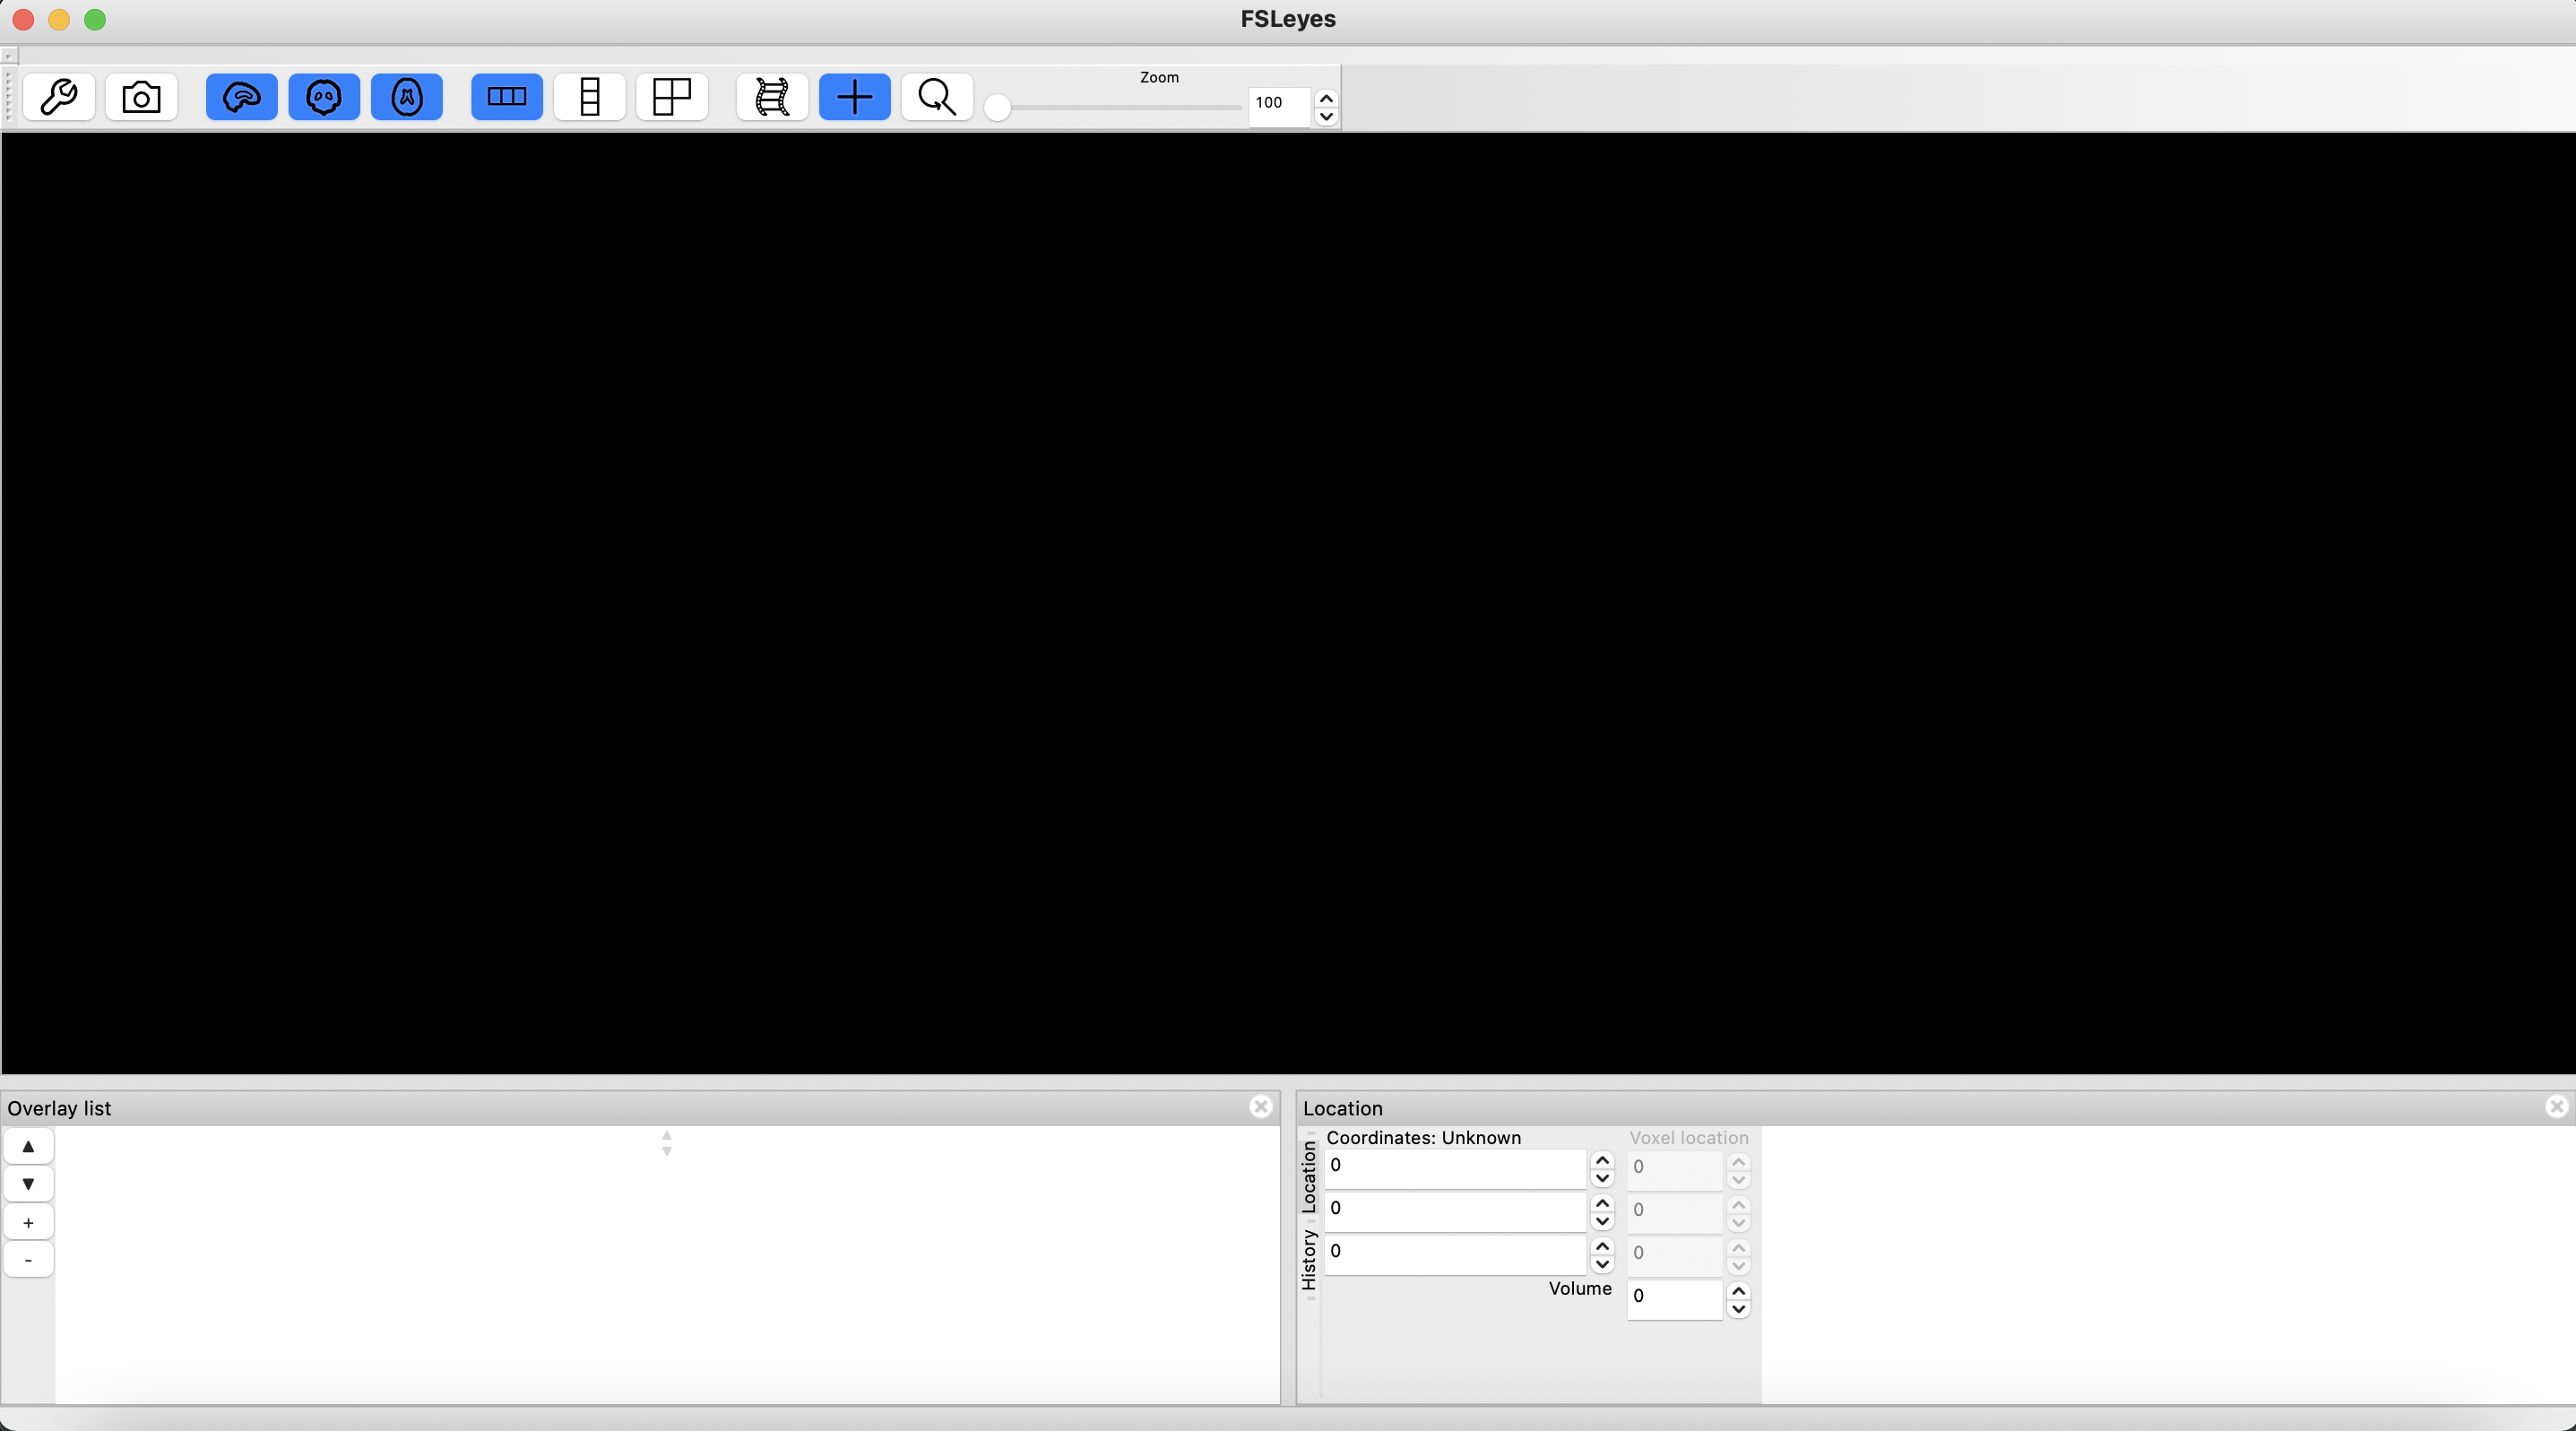
Open FSLeyes. If you are using the default layout, the screen should look like this
step 4
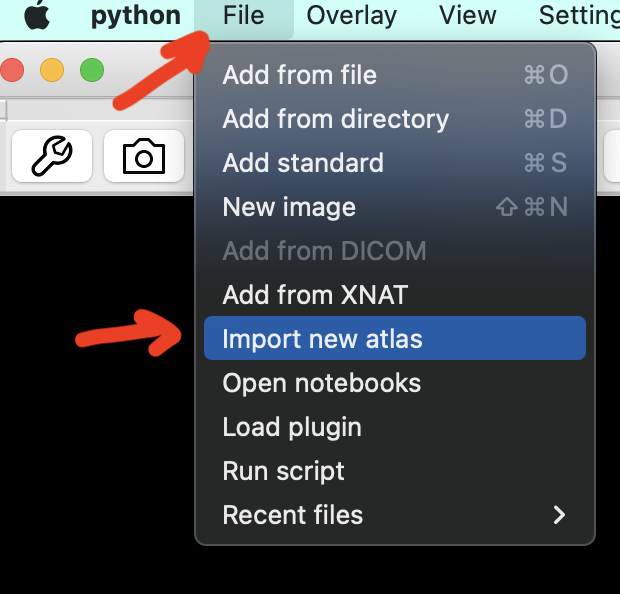
Click on File > Import new atlas
step 5
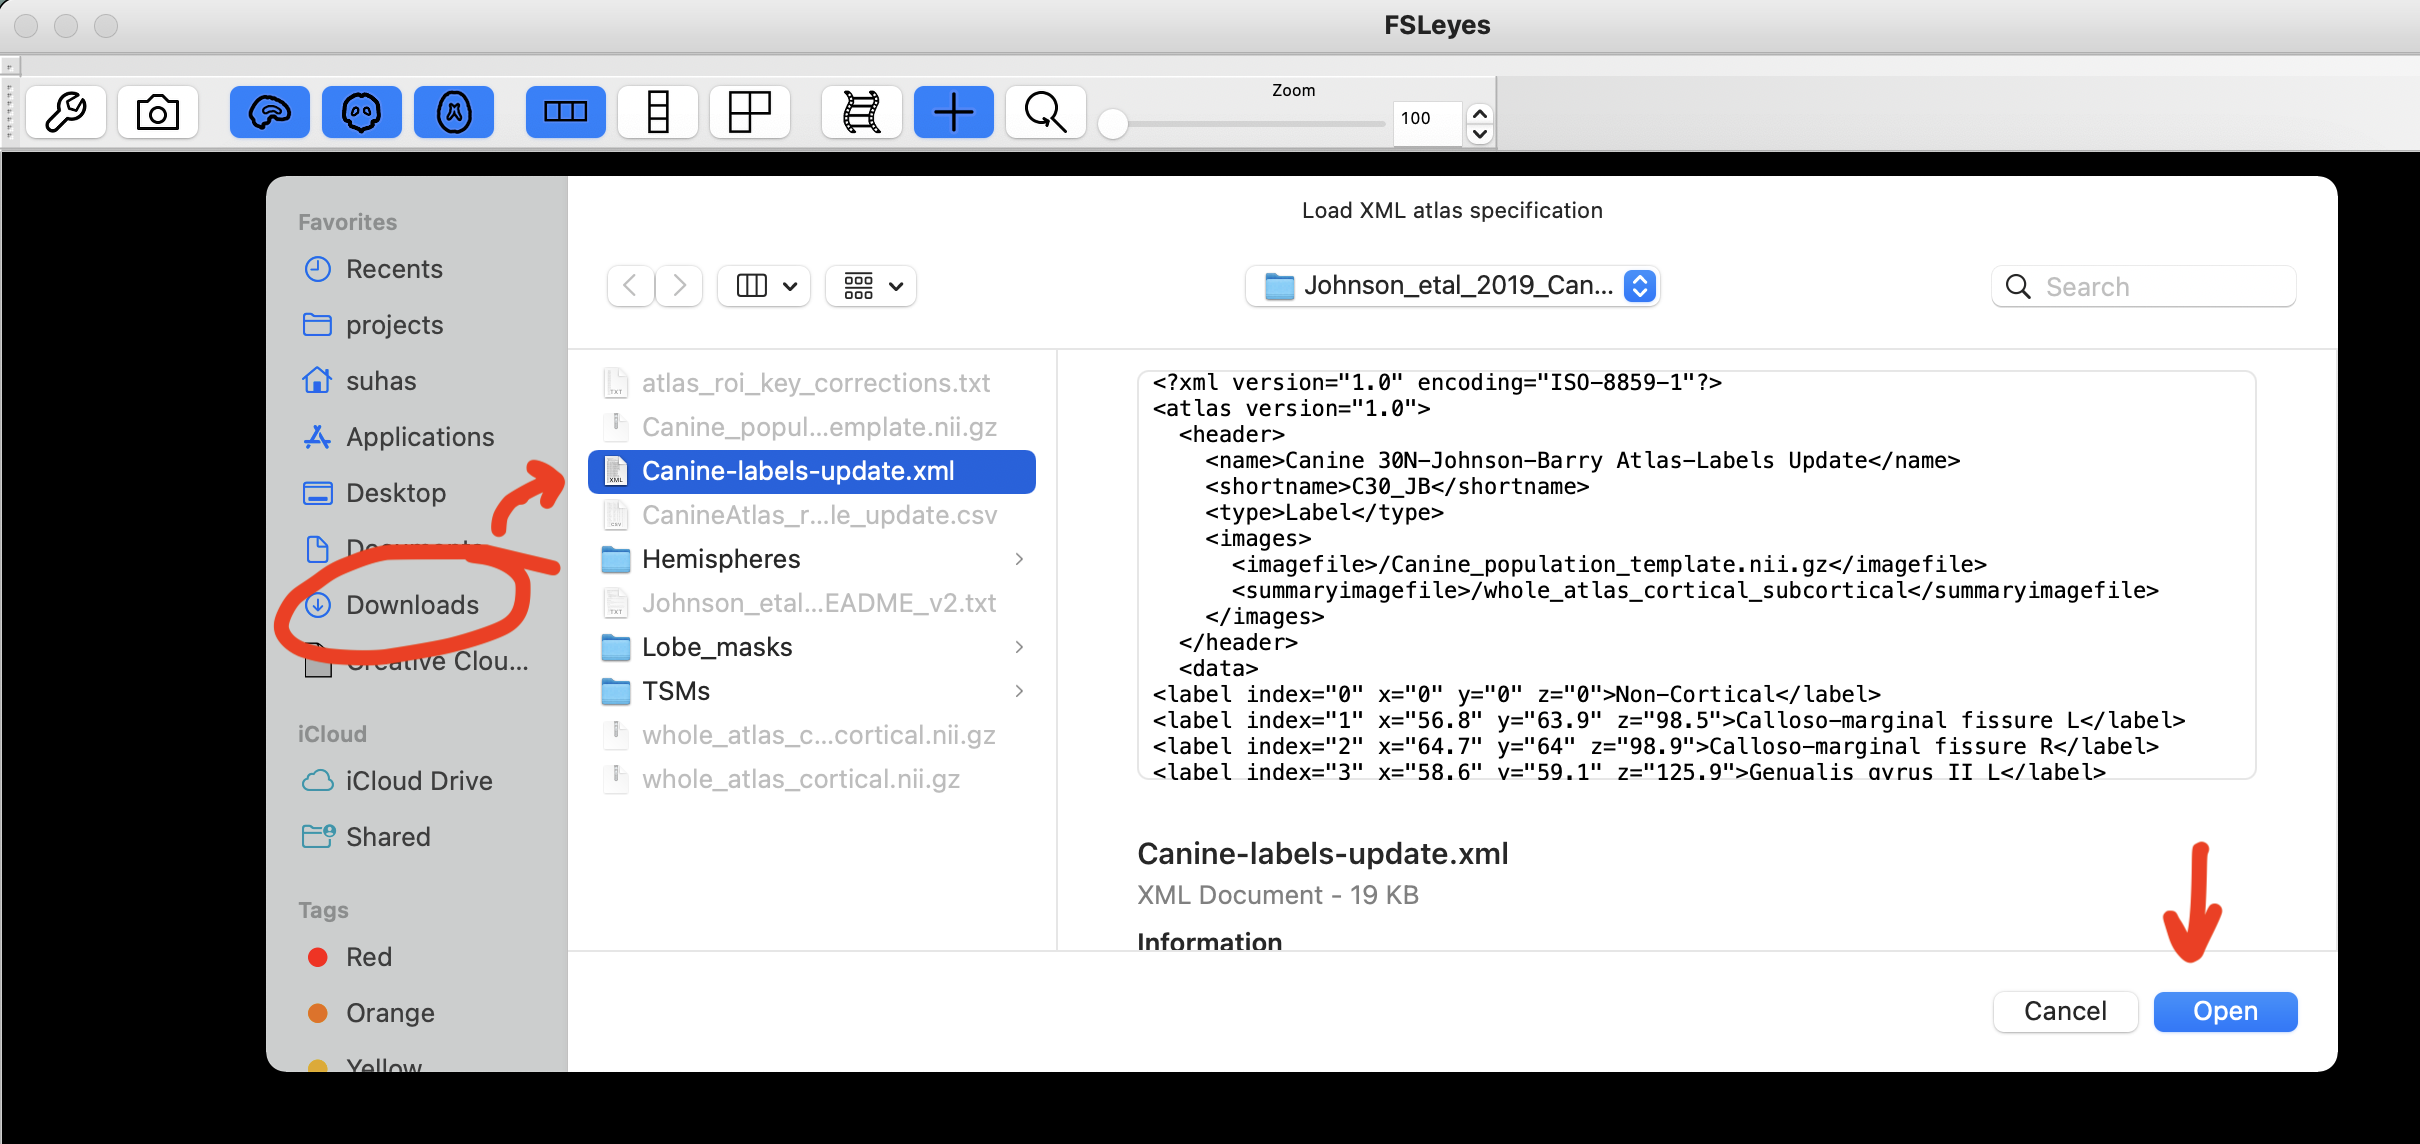
Navigate to the atlas folder, select Canine-labels-update.xml file, and click open. Surprisingly, there is no pop-up message that tells you if everything went well, as expected or if there was an error!
step 6
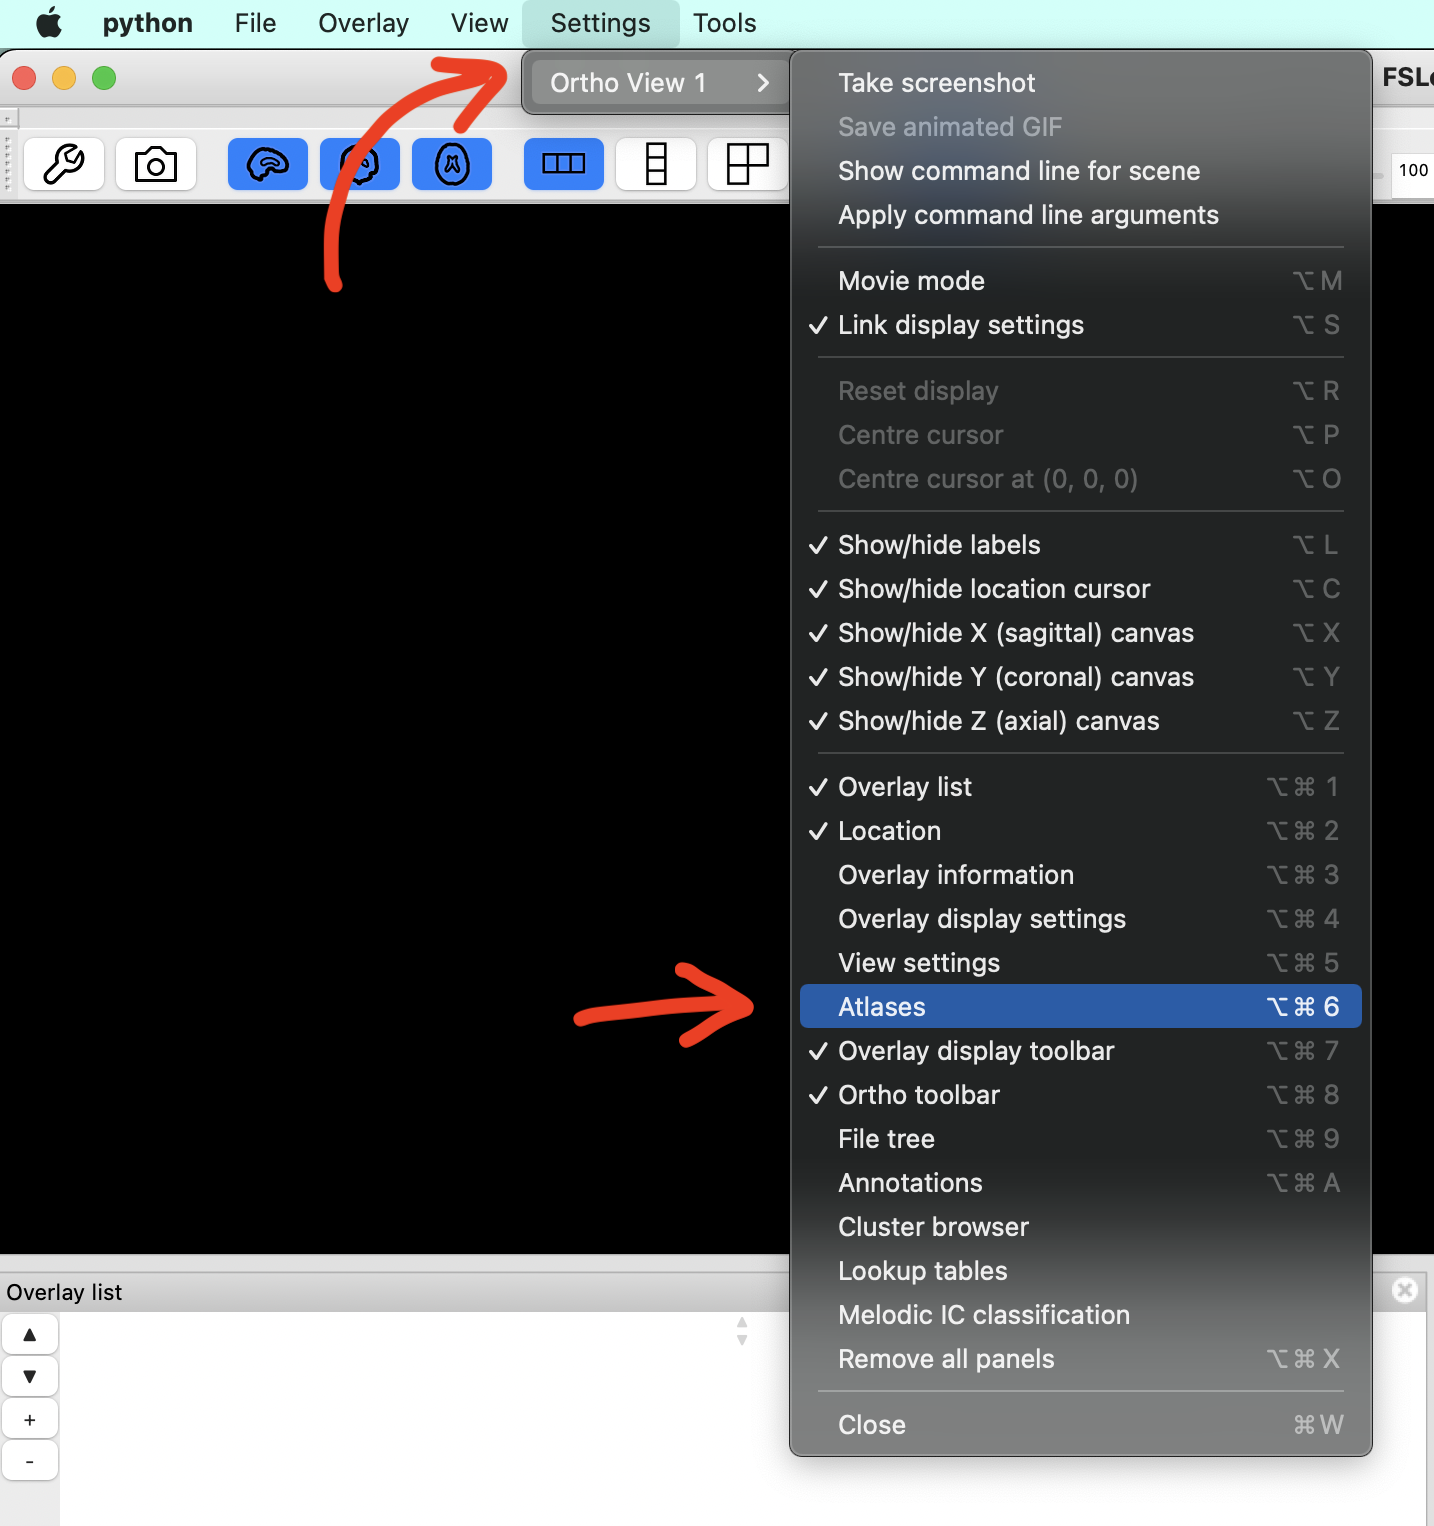
Display your atlases by clicking Settings > Ortho View 1 > Atlases.
(shortcut: Cmd + Opt + 6).
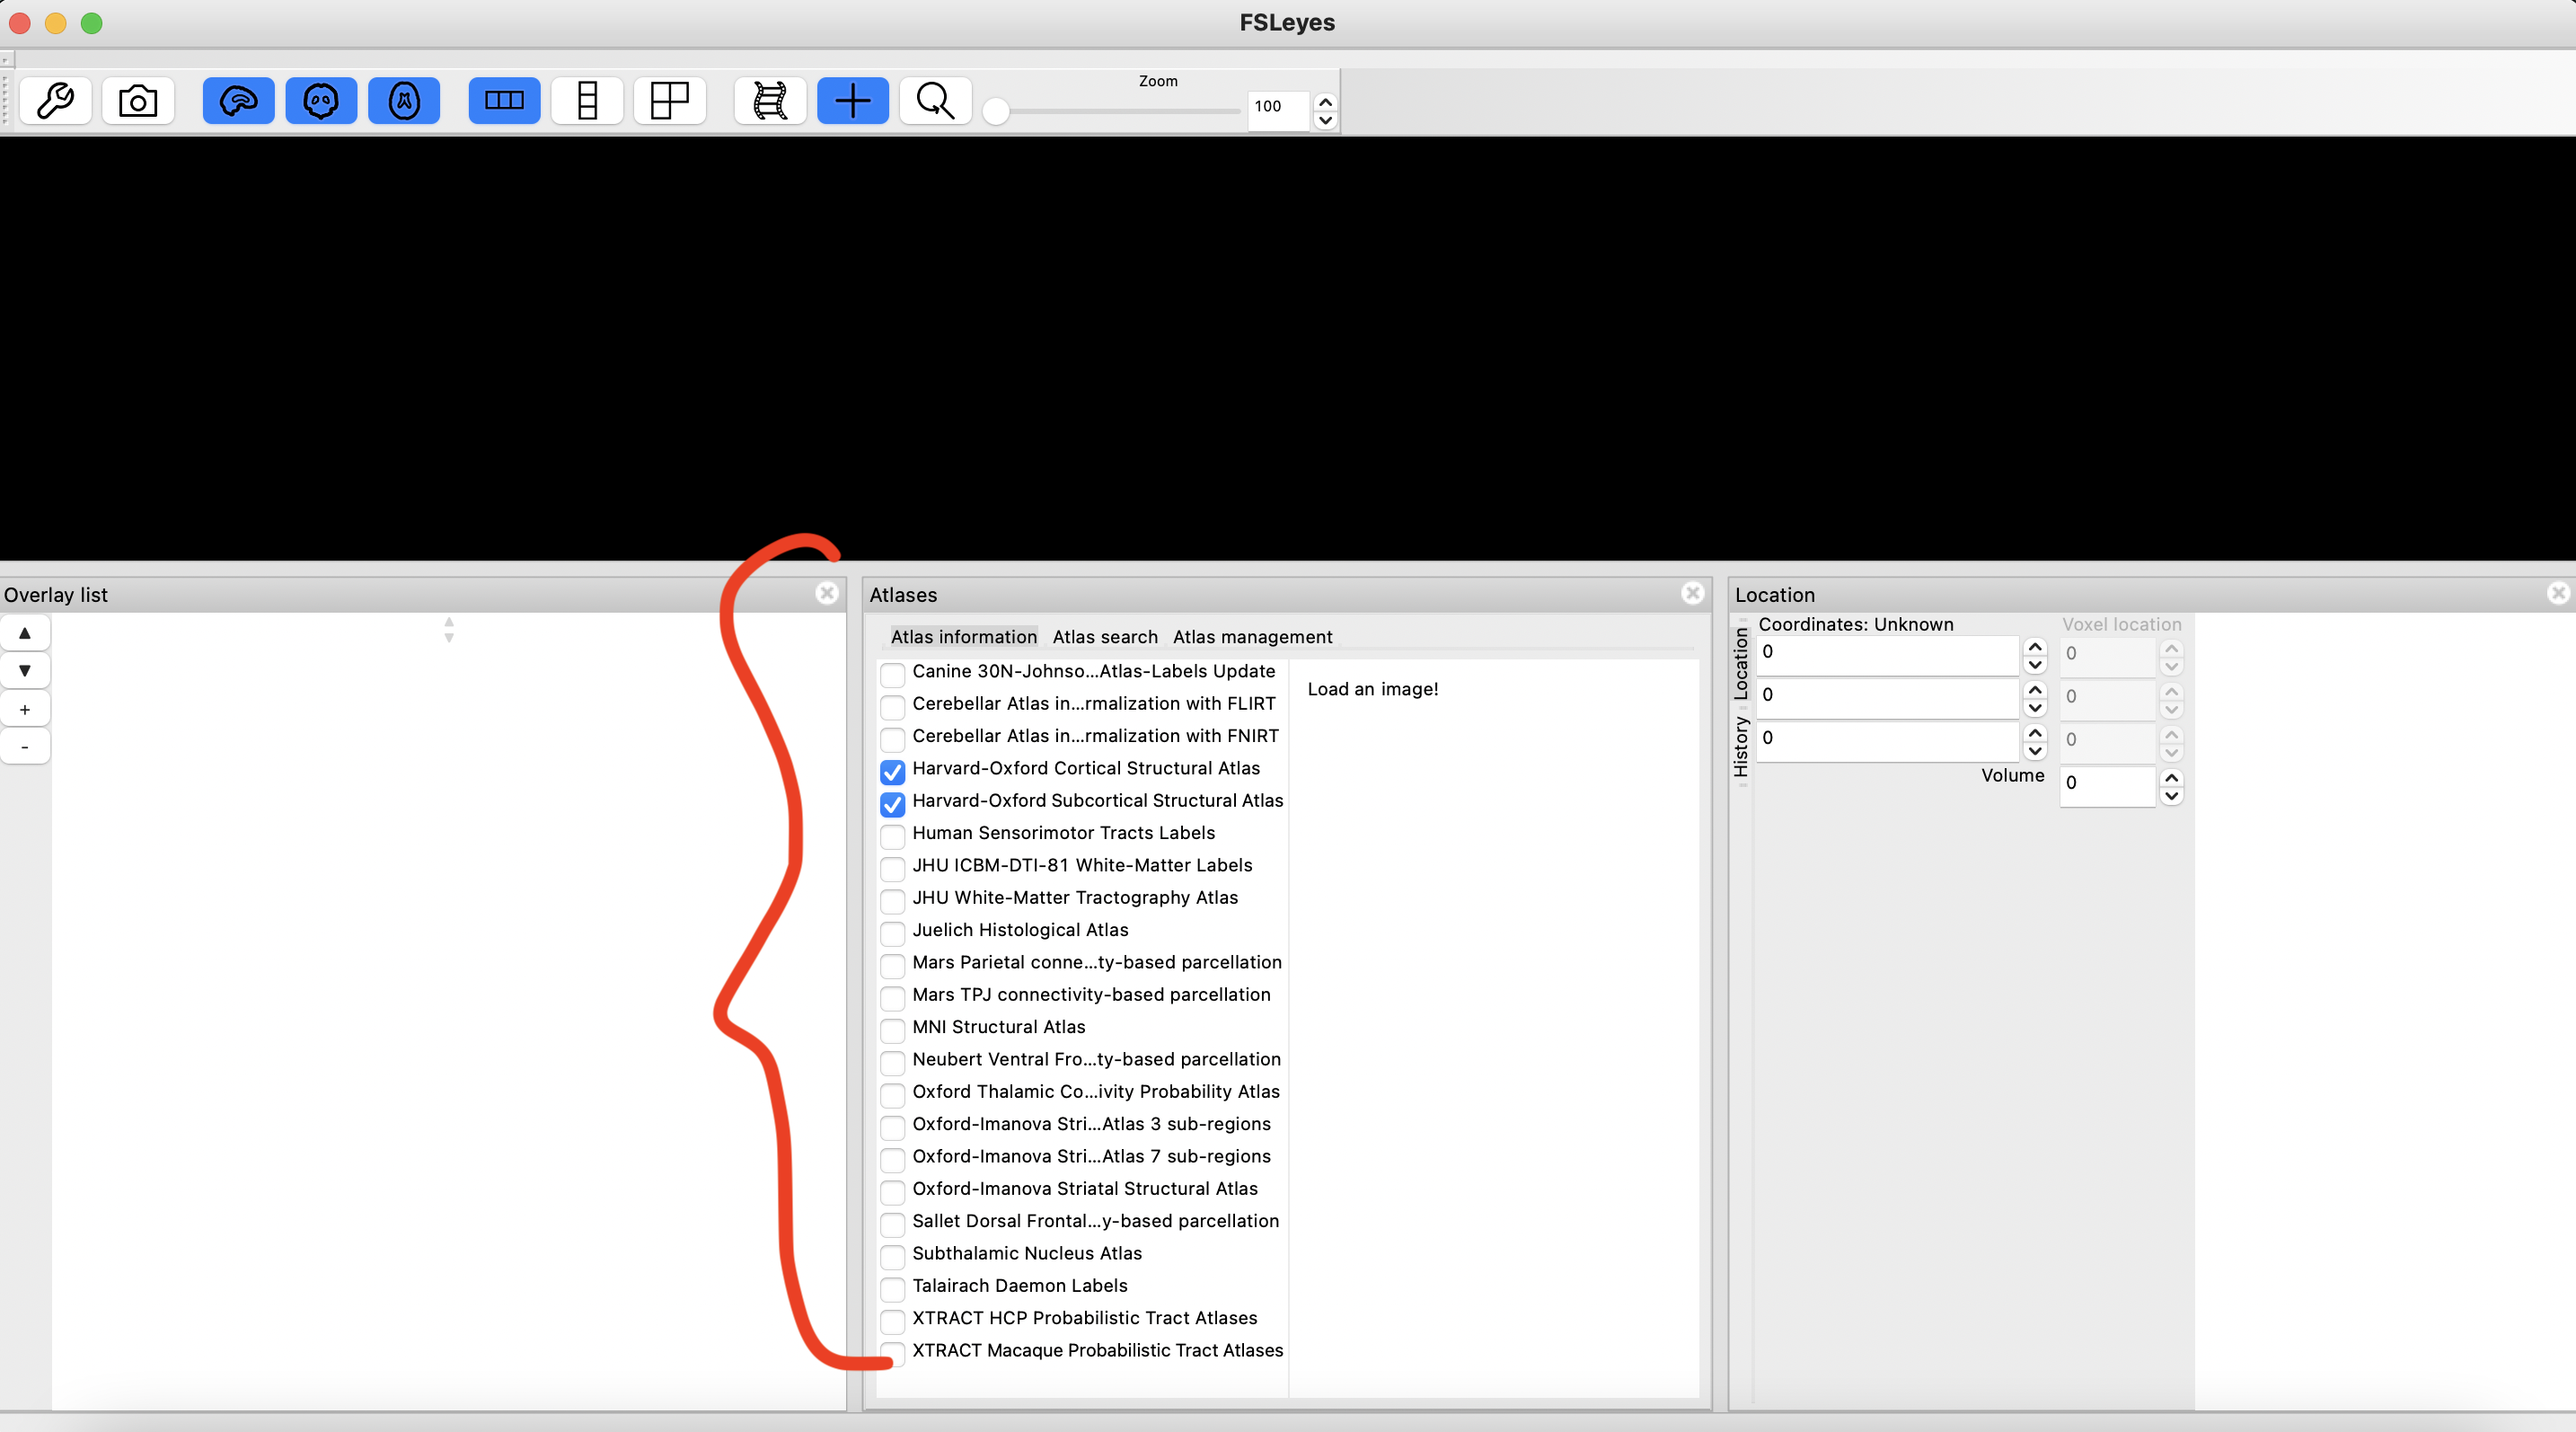
step 7
You should now see a section with all of the available atlases.
step 8
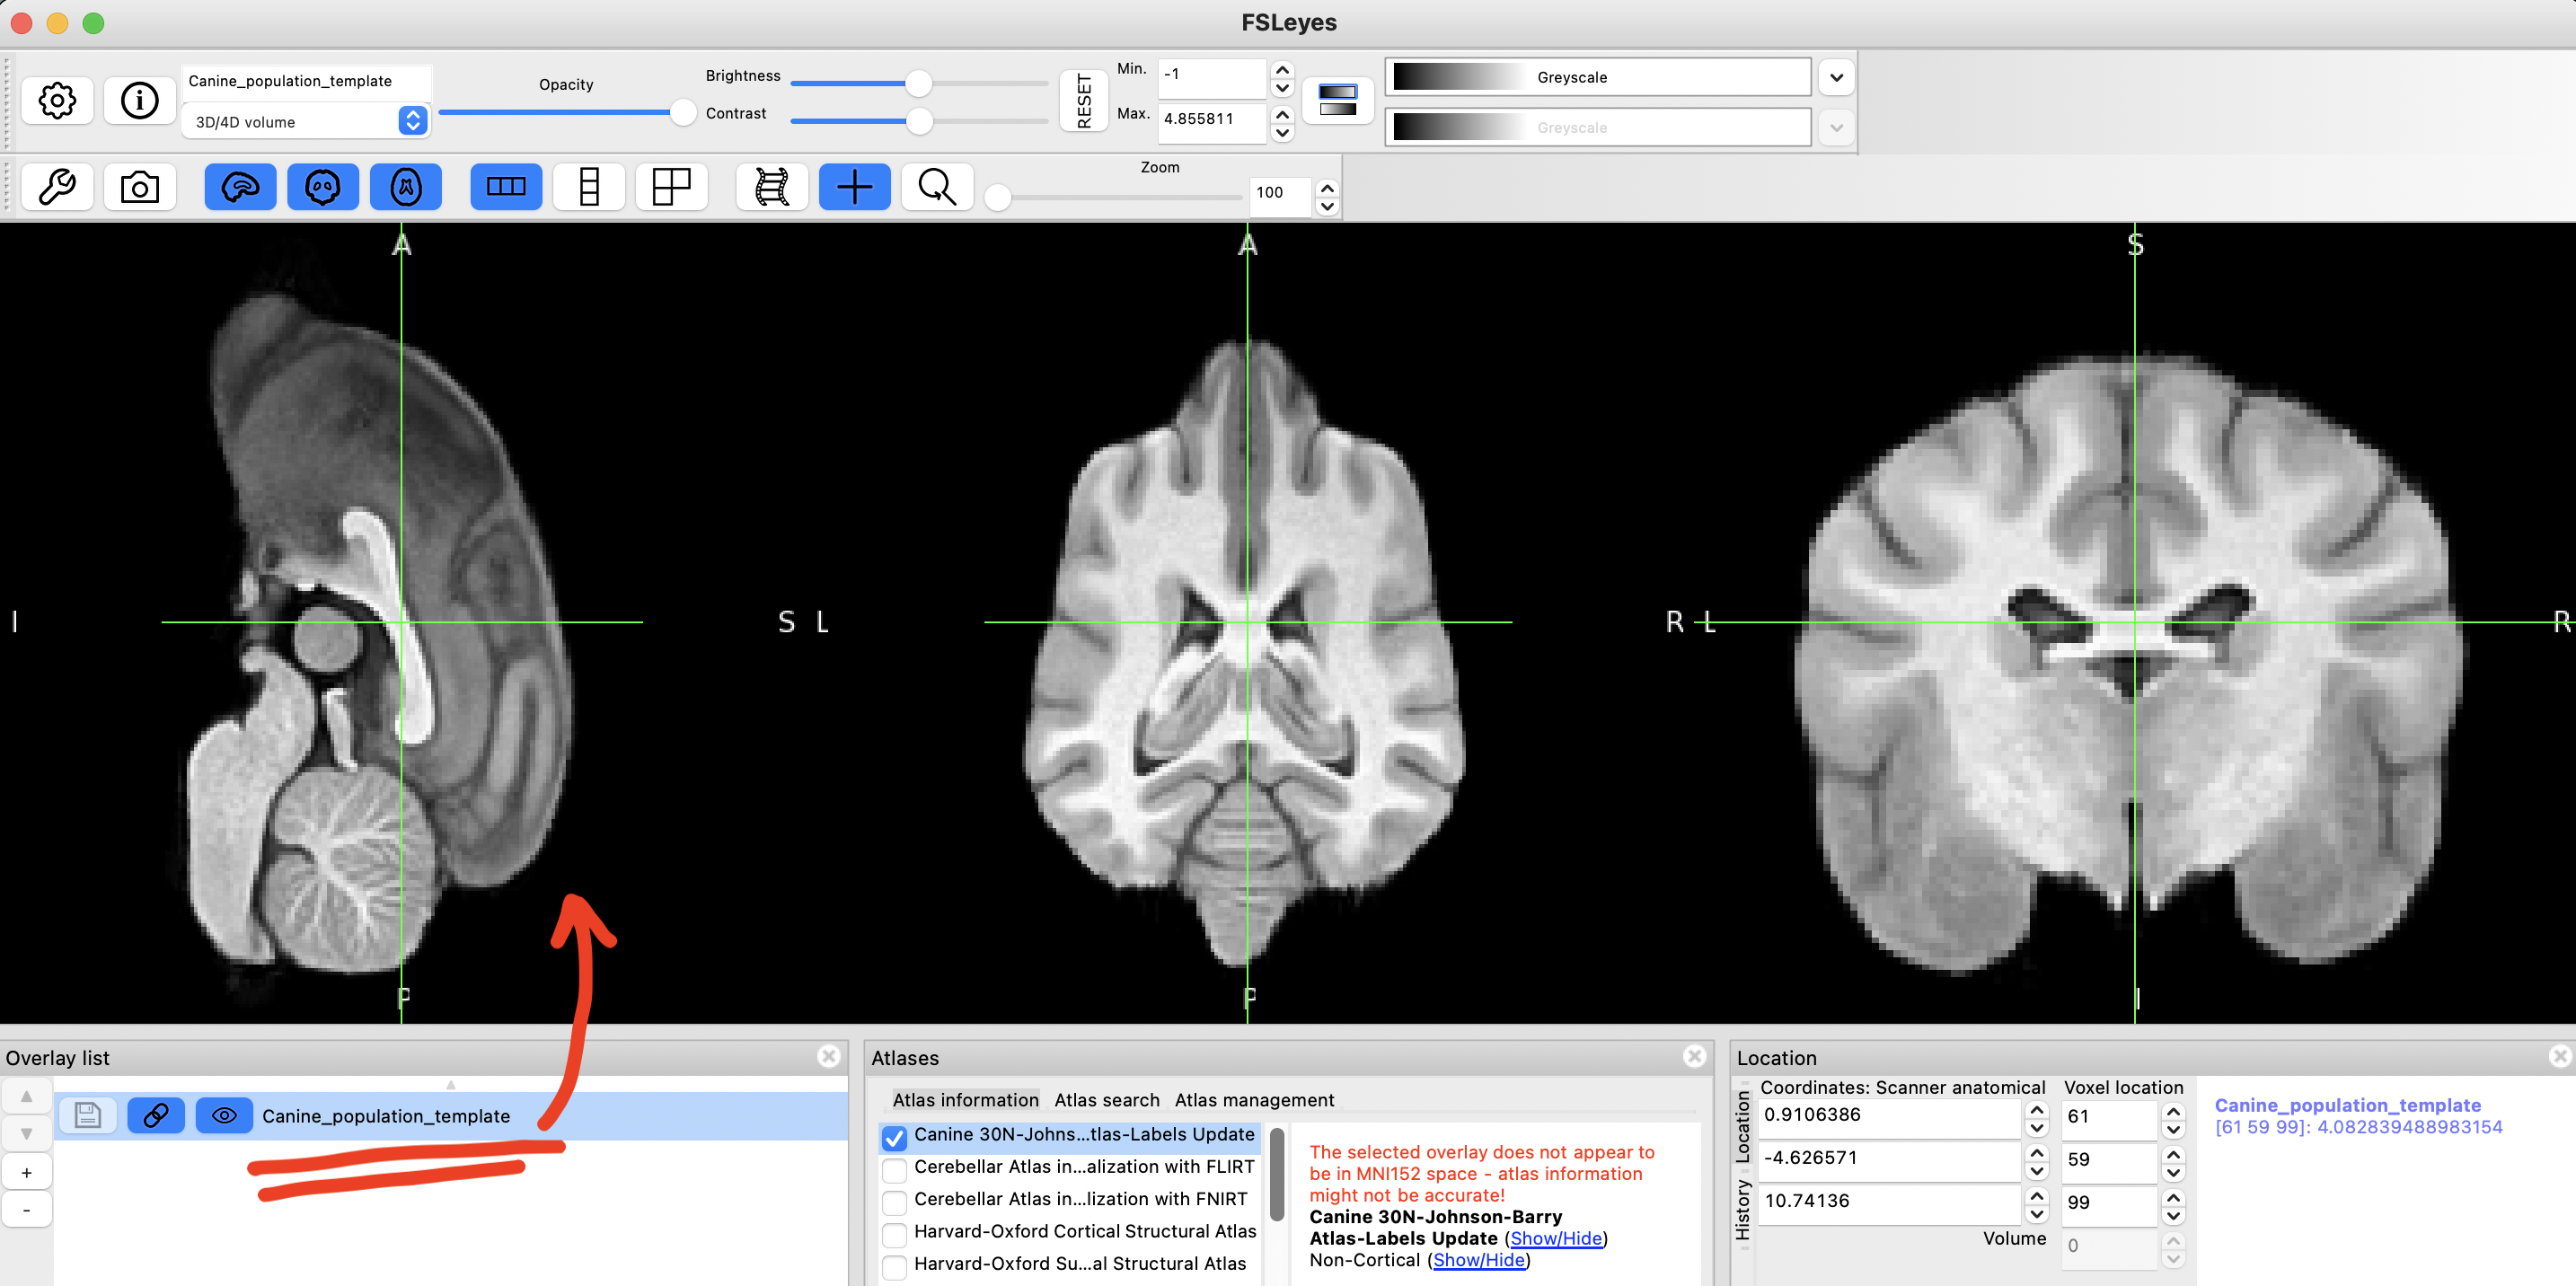
Now, load the Canine_population_template.nii.gz file, either by dragging and dropping it on to the app, or File > Add from file
(shortcut: Cmd + O).
step 9
Unselect unwanted atlases, and select Canine 30N-Johnson-Barry-Atlas-Labels Update.
step 10
If you now click on a brain region that is listed in the atlas, you should see its label.
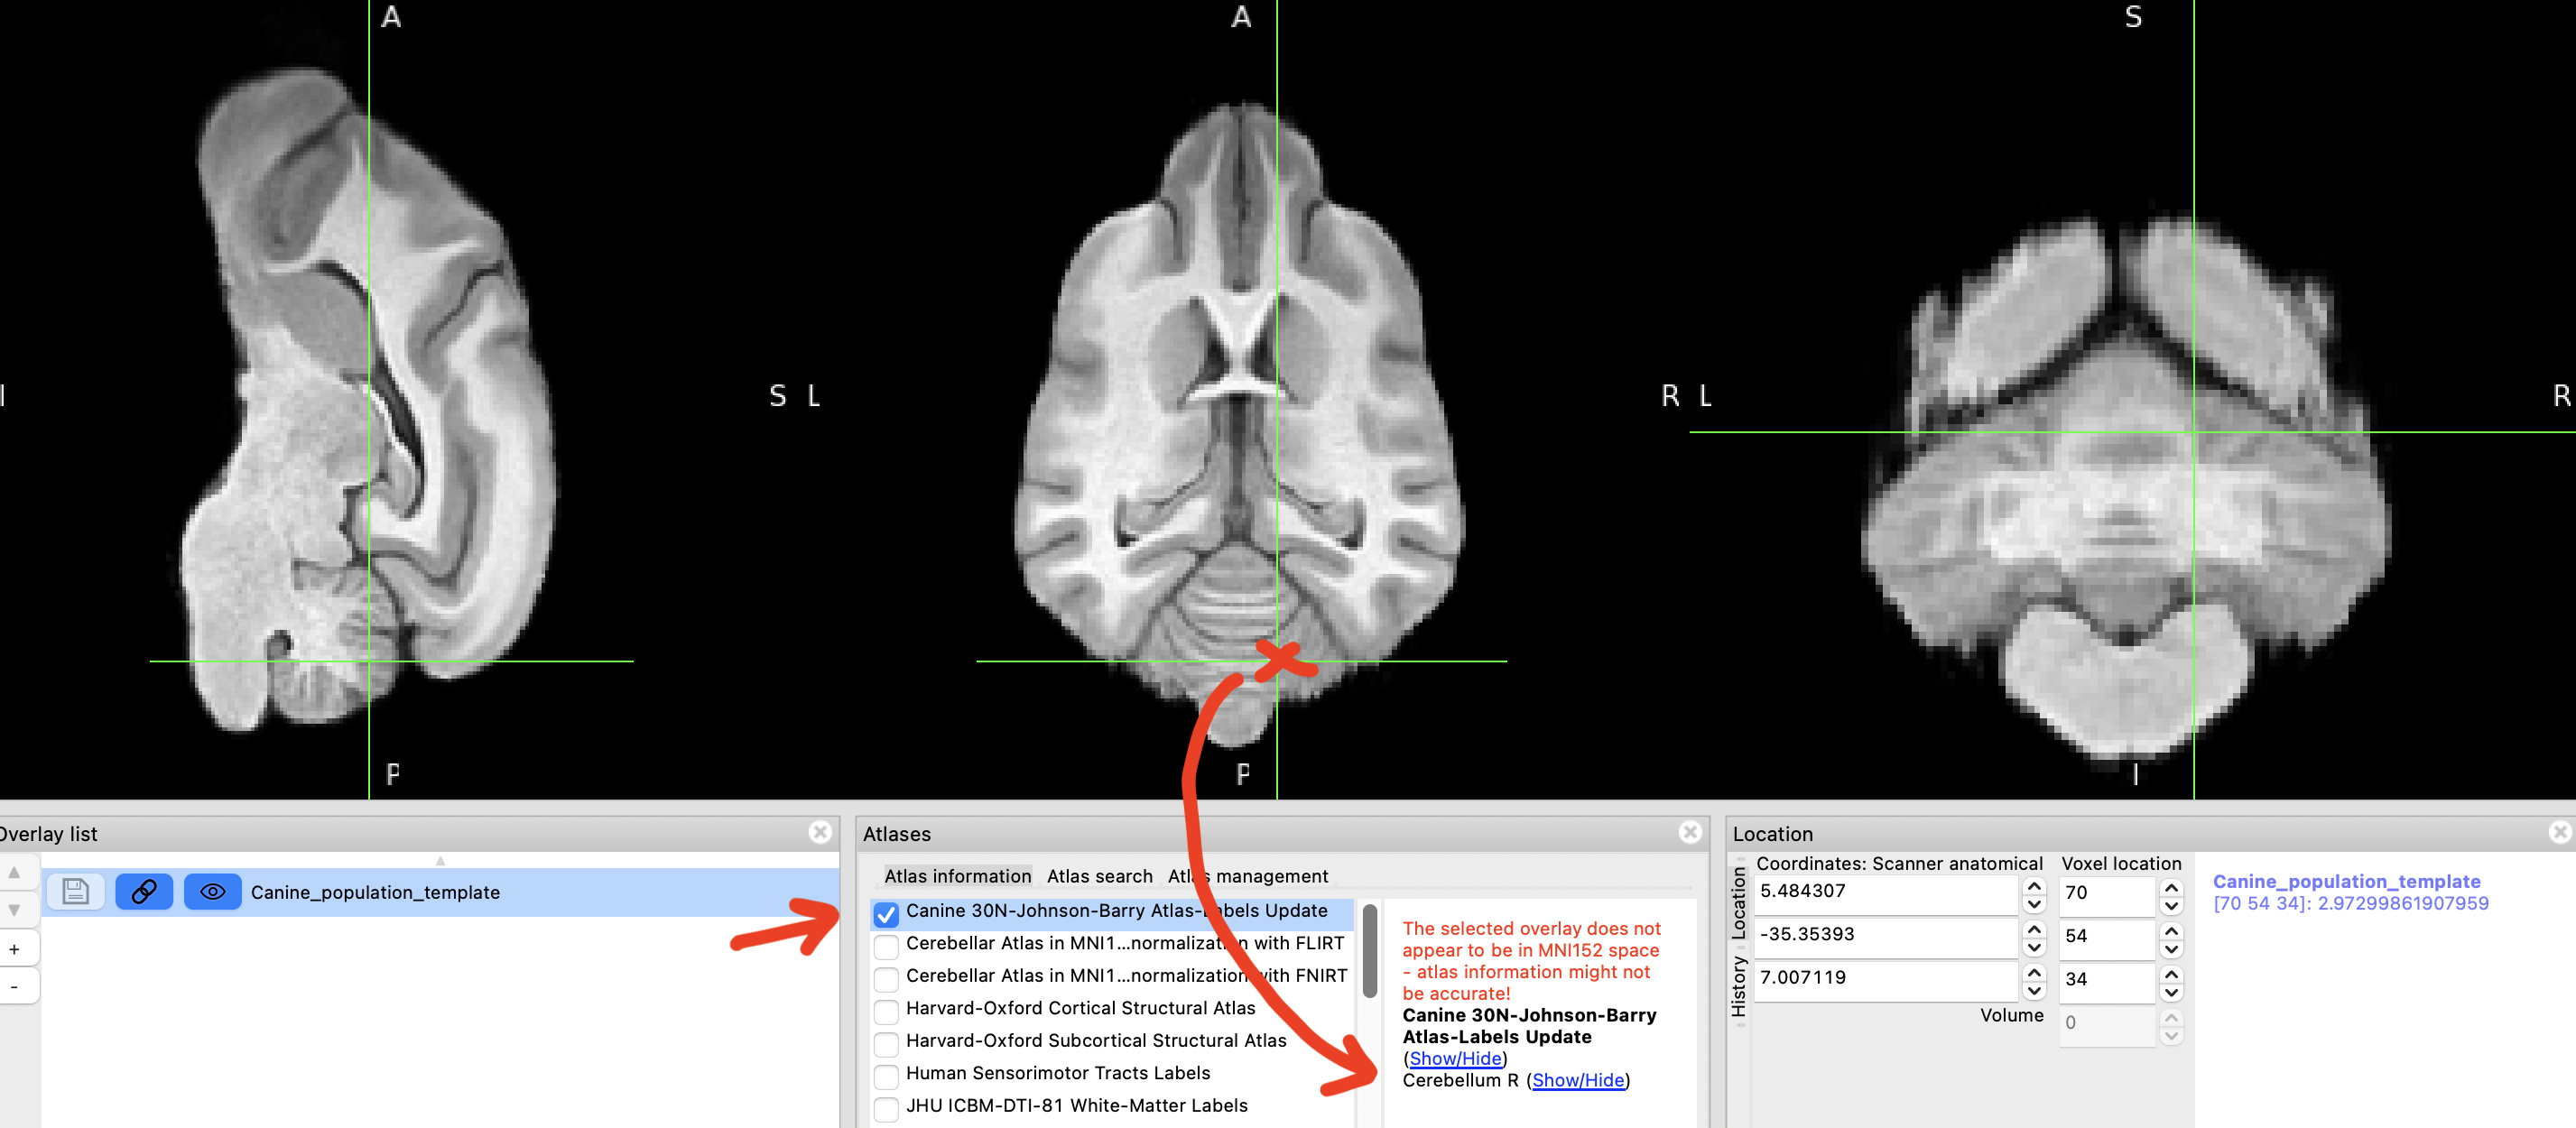
step 11
Clicking on "Show/Hide" option next to the atlas name allows you to visualise various brain regions in different colours.

Not all of the labeled regions are visualised in this way for some reason.
¯\_(ツ)_/¯
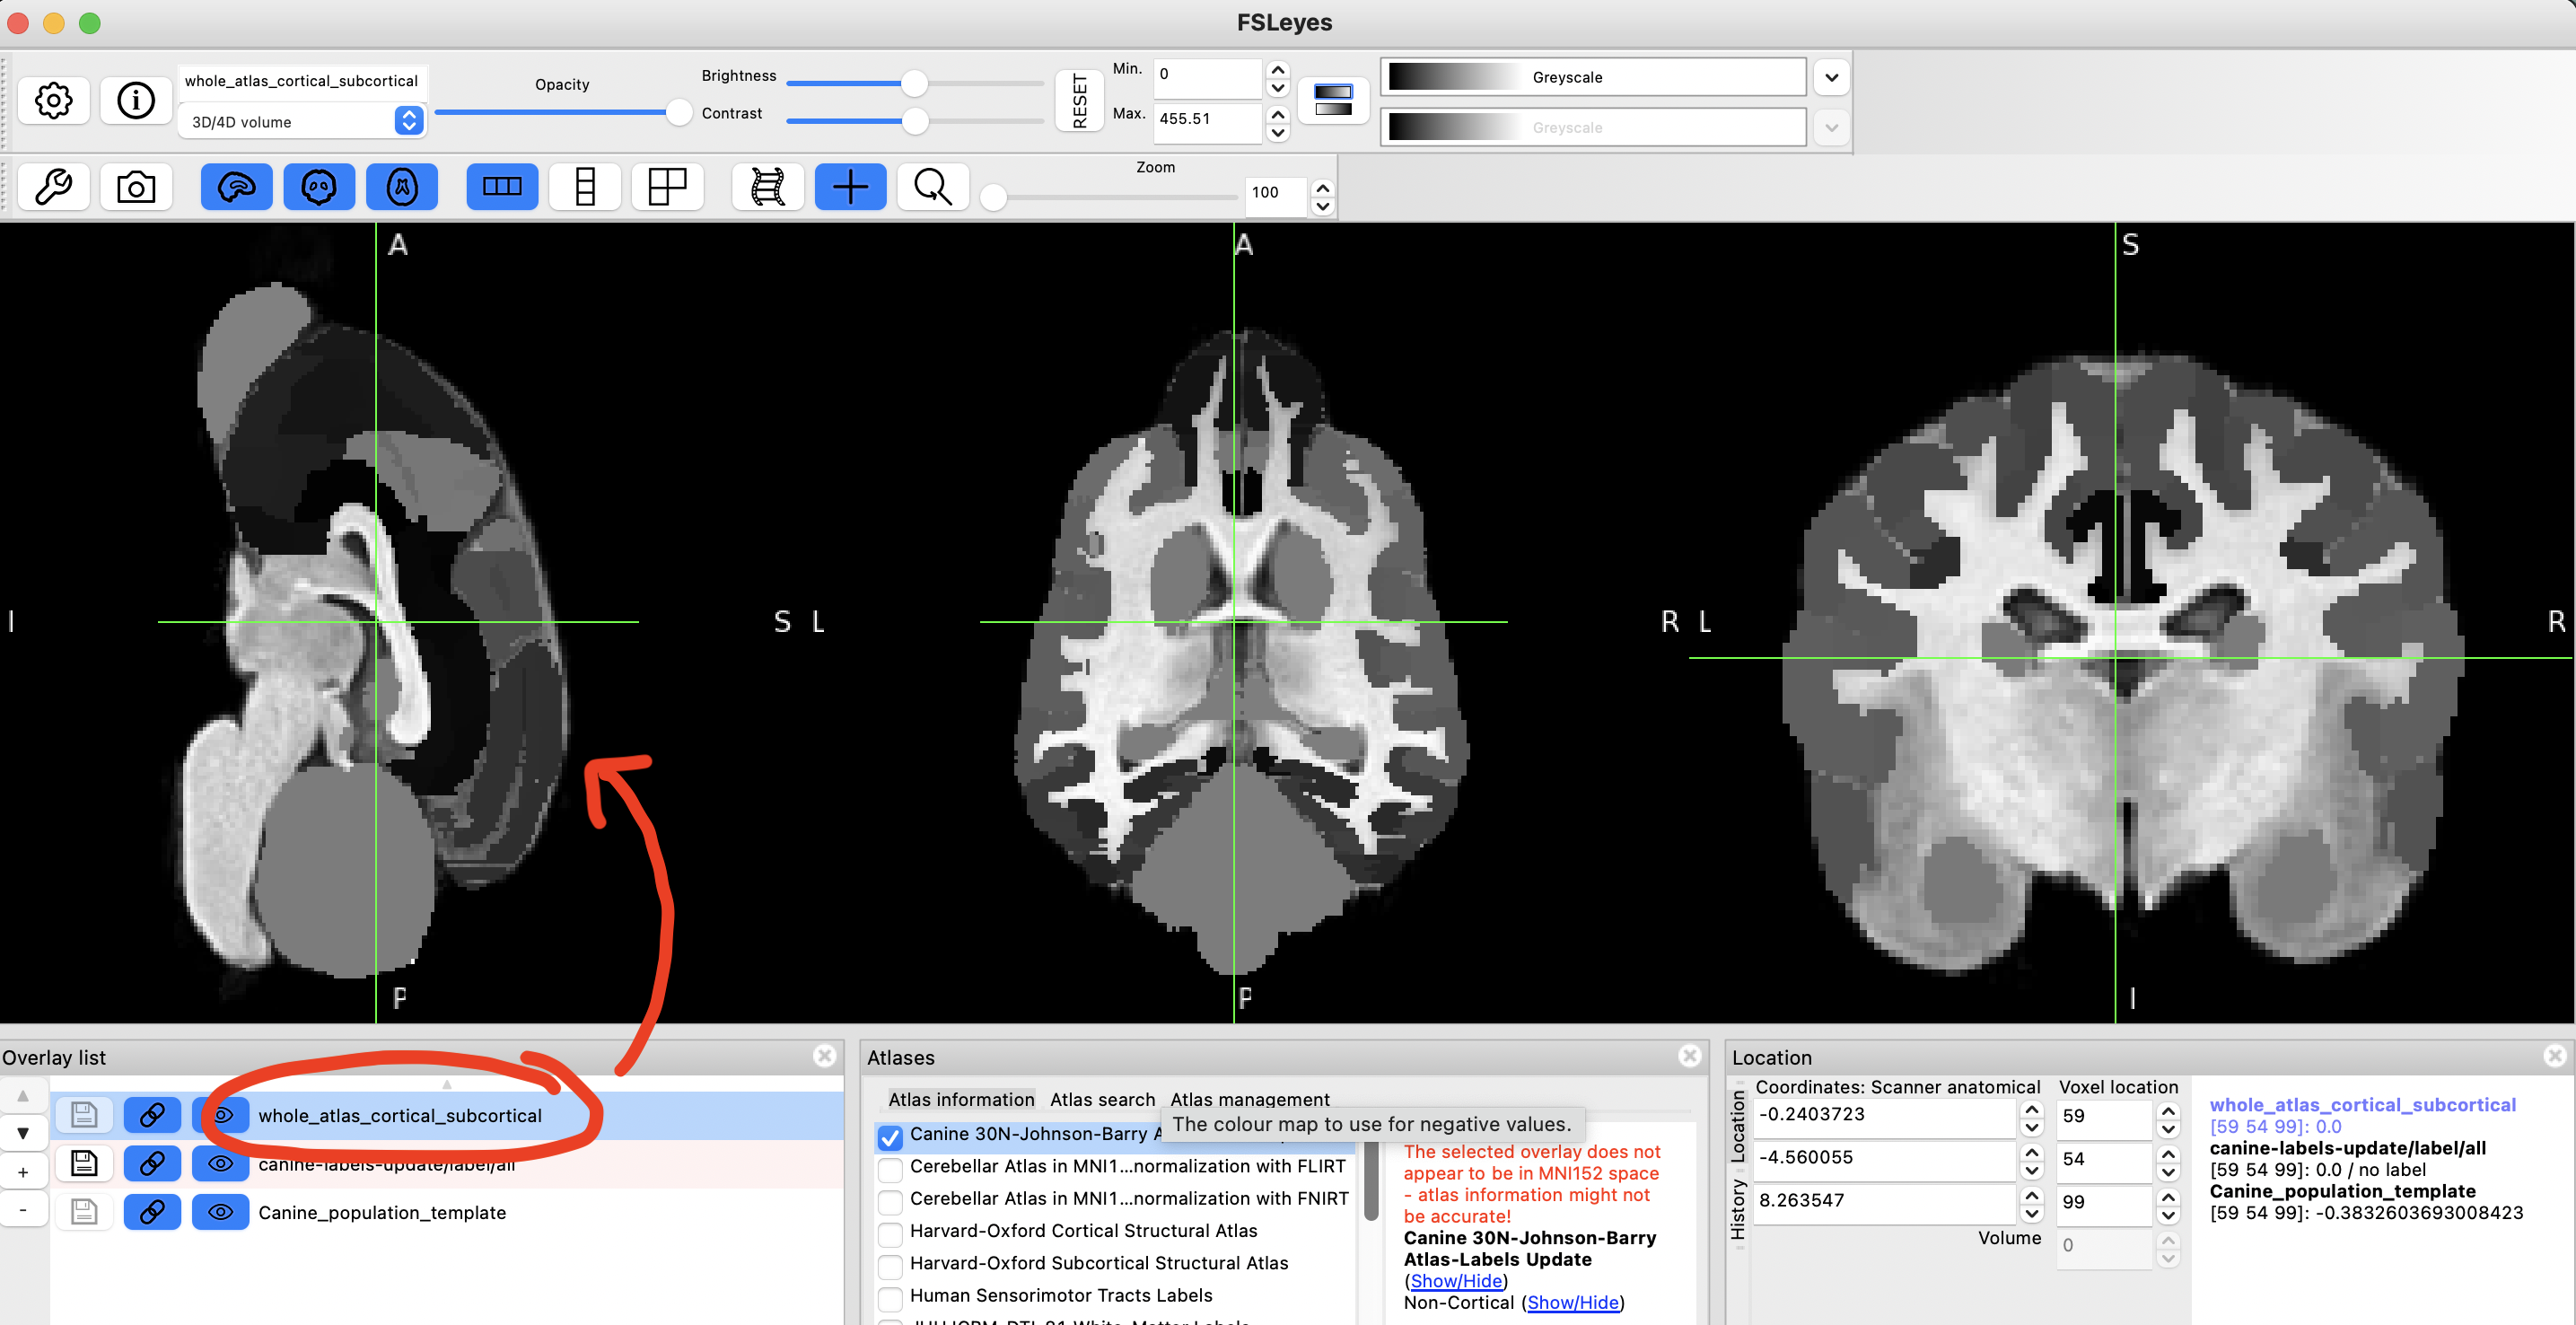
So, let us make use of thewhole_atlas_cortical_subcortical.nii.gzfile.
step 12
Load whole_atlas_cortical_subcortical.nii.gz, the same way you loaded the template brain (shortcut: Cmd + O).
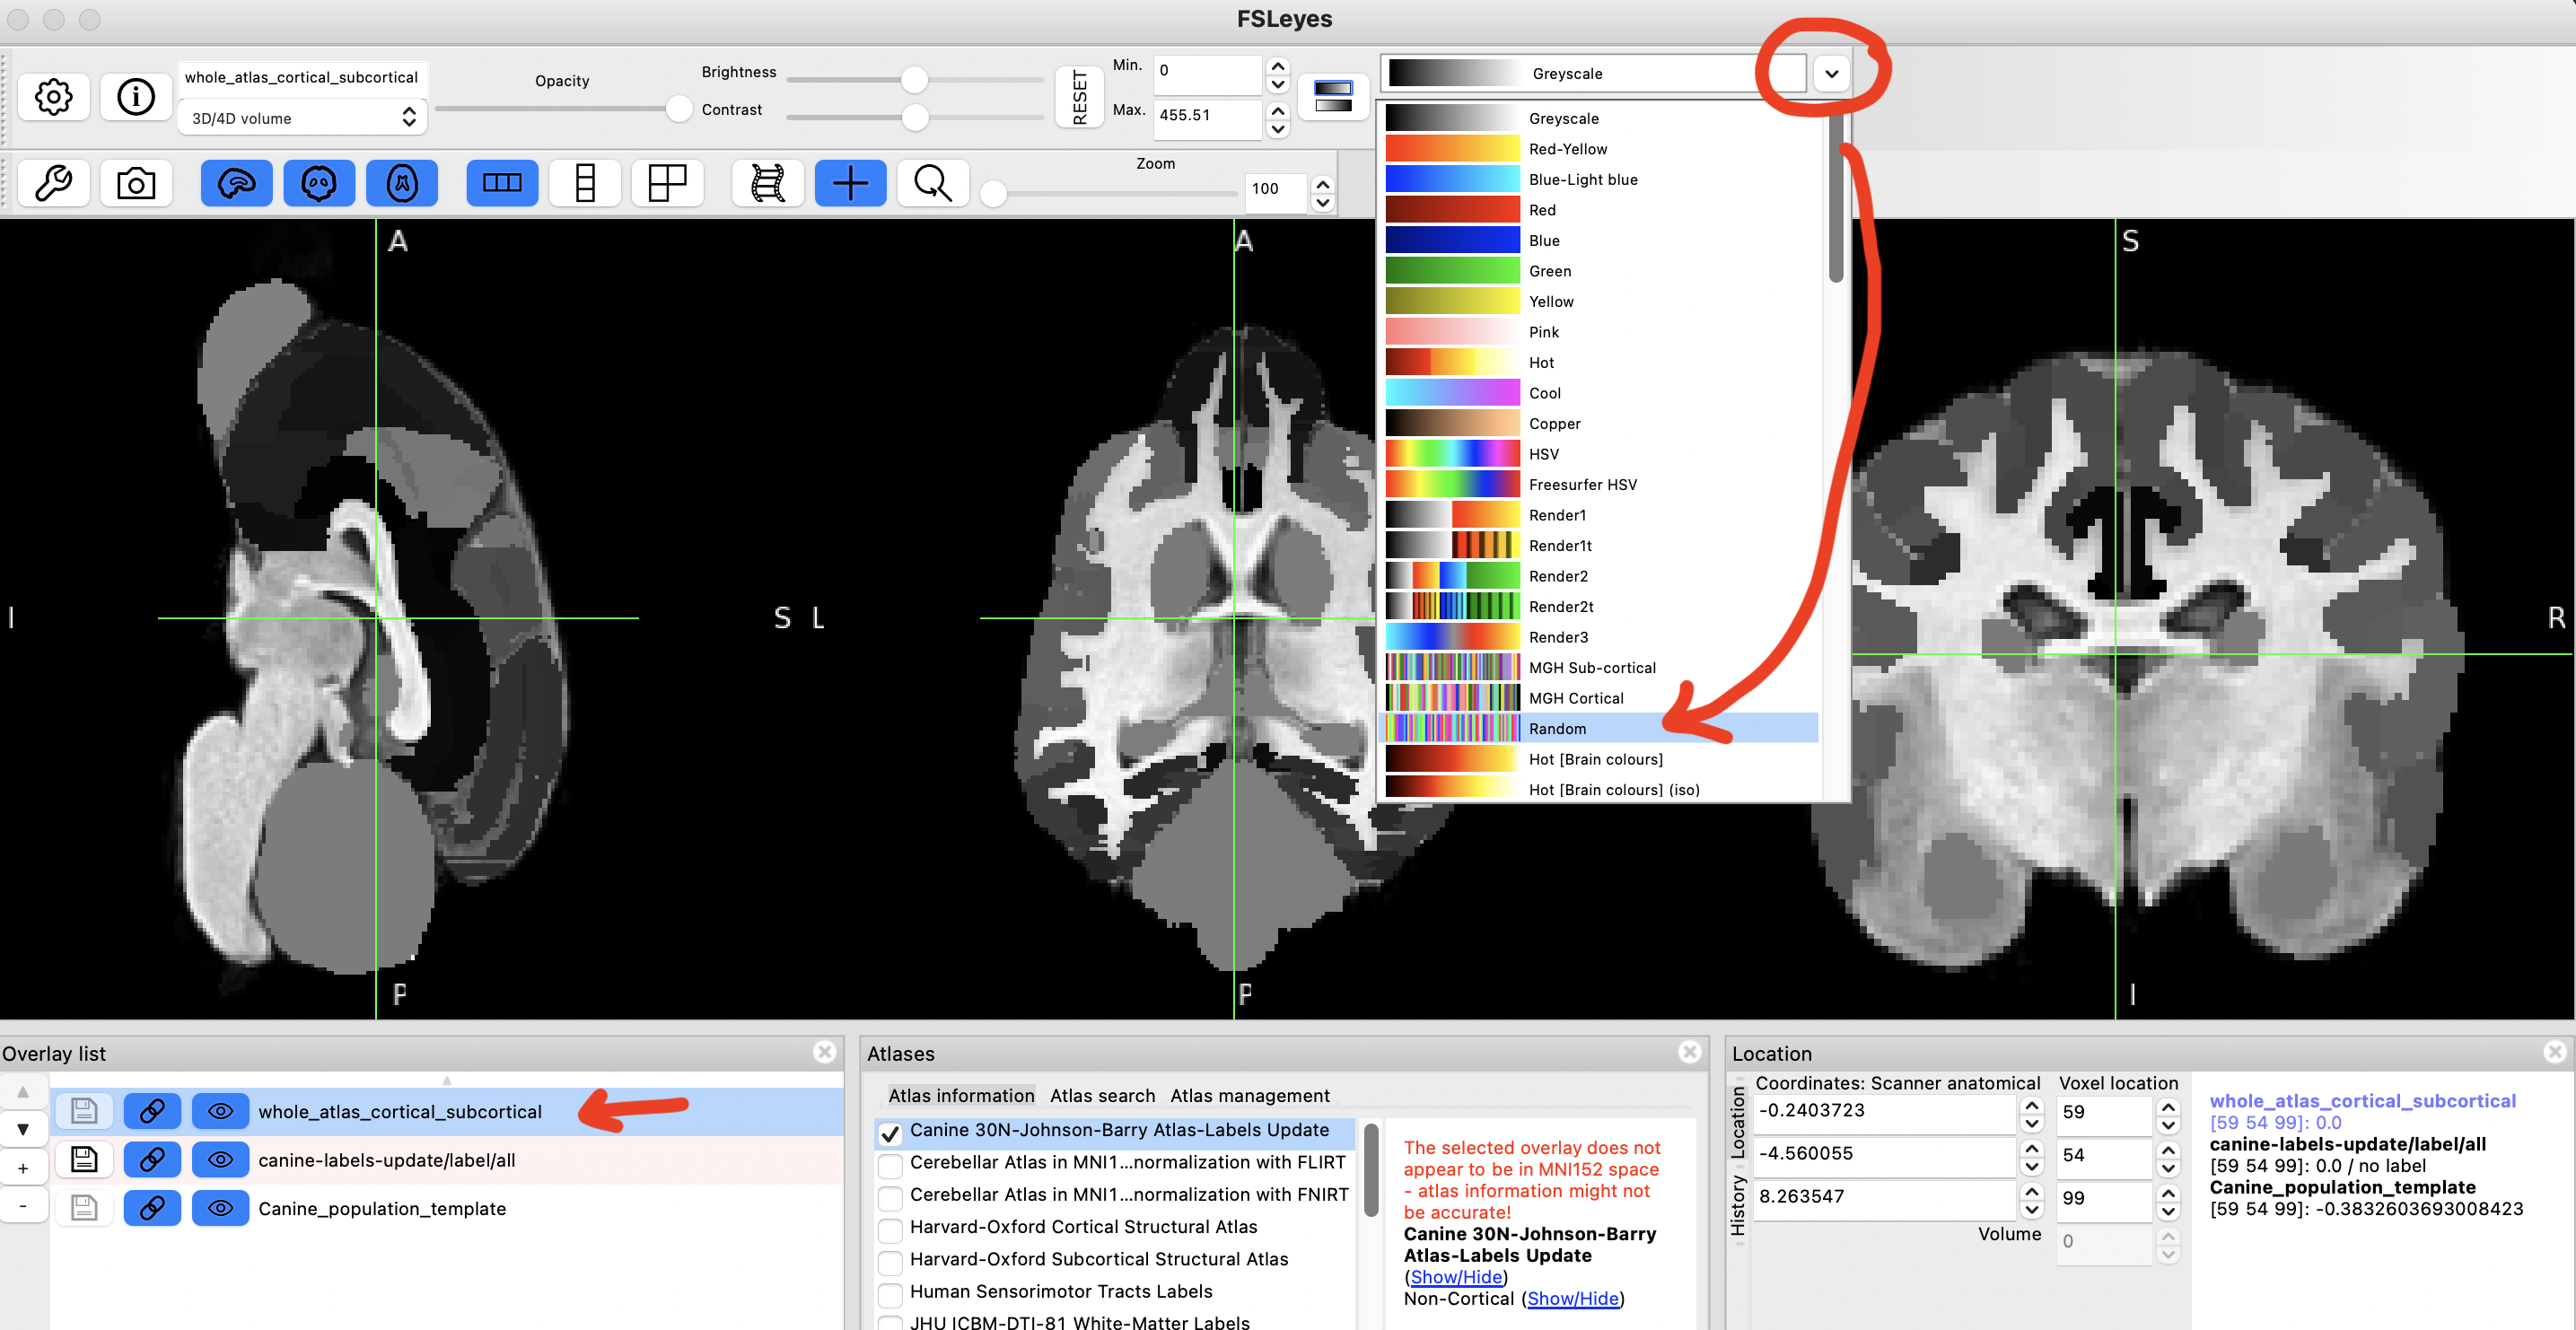
step 13
Change colourmap of this file. I recommend using Random or one of the MGH ones.
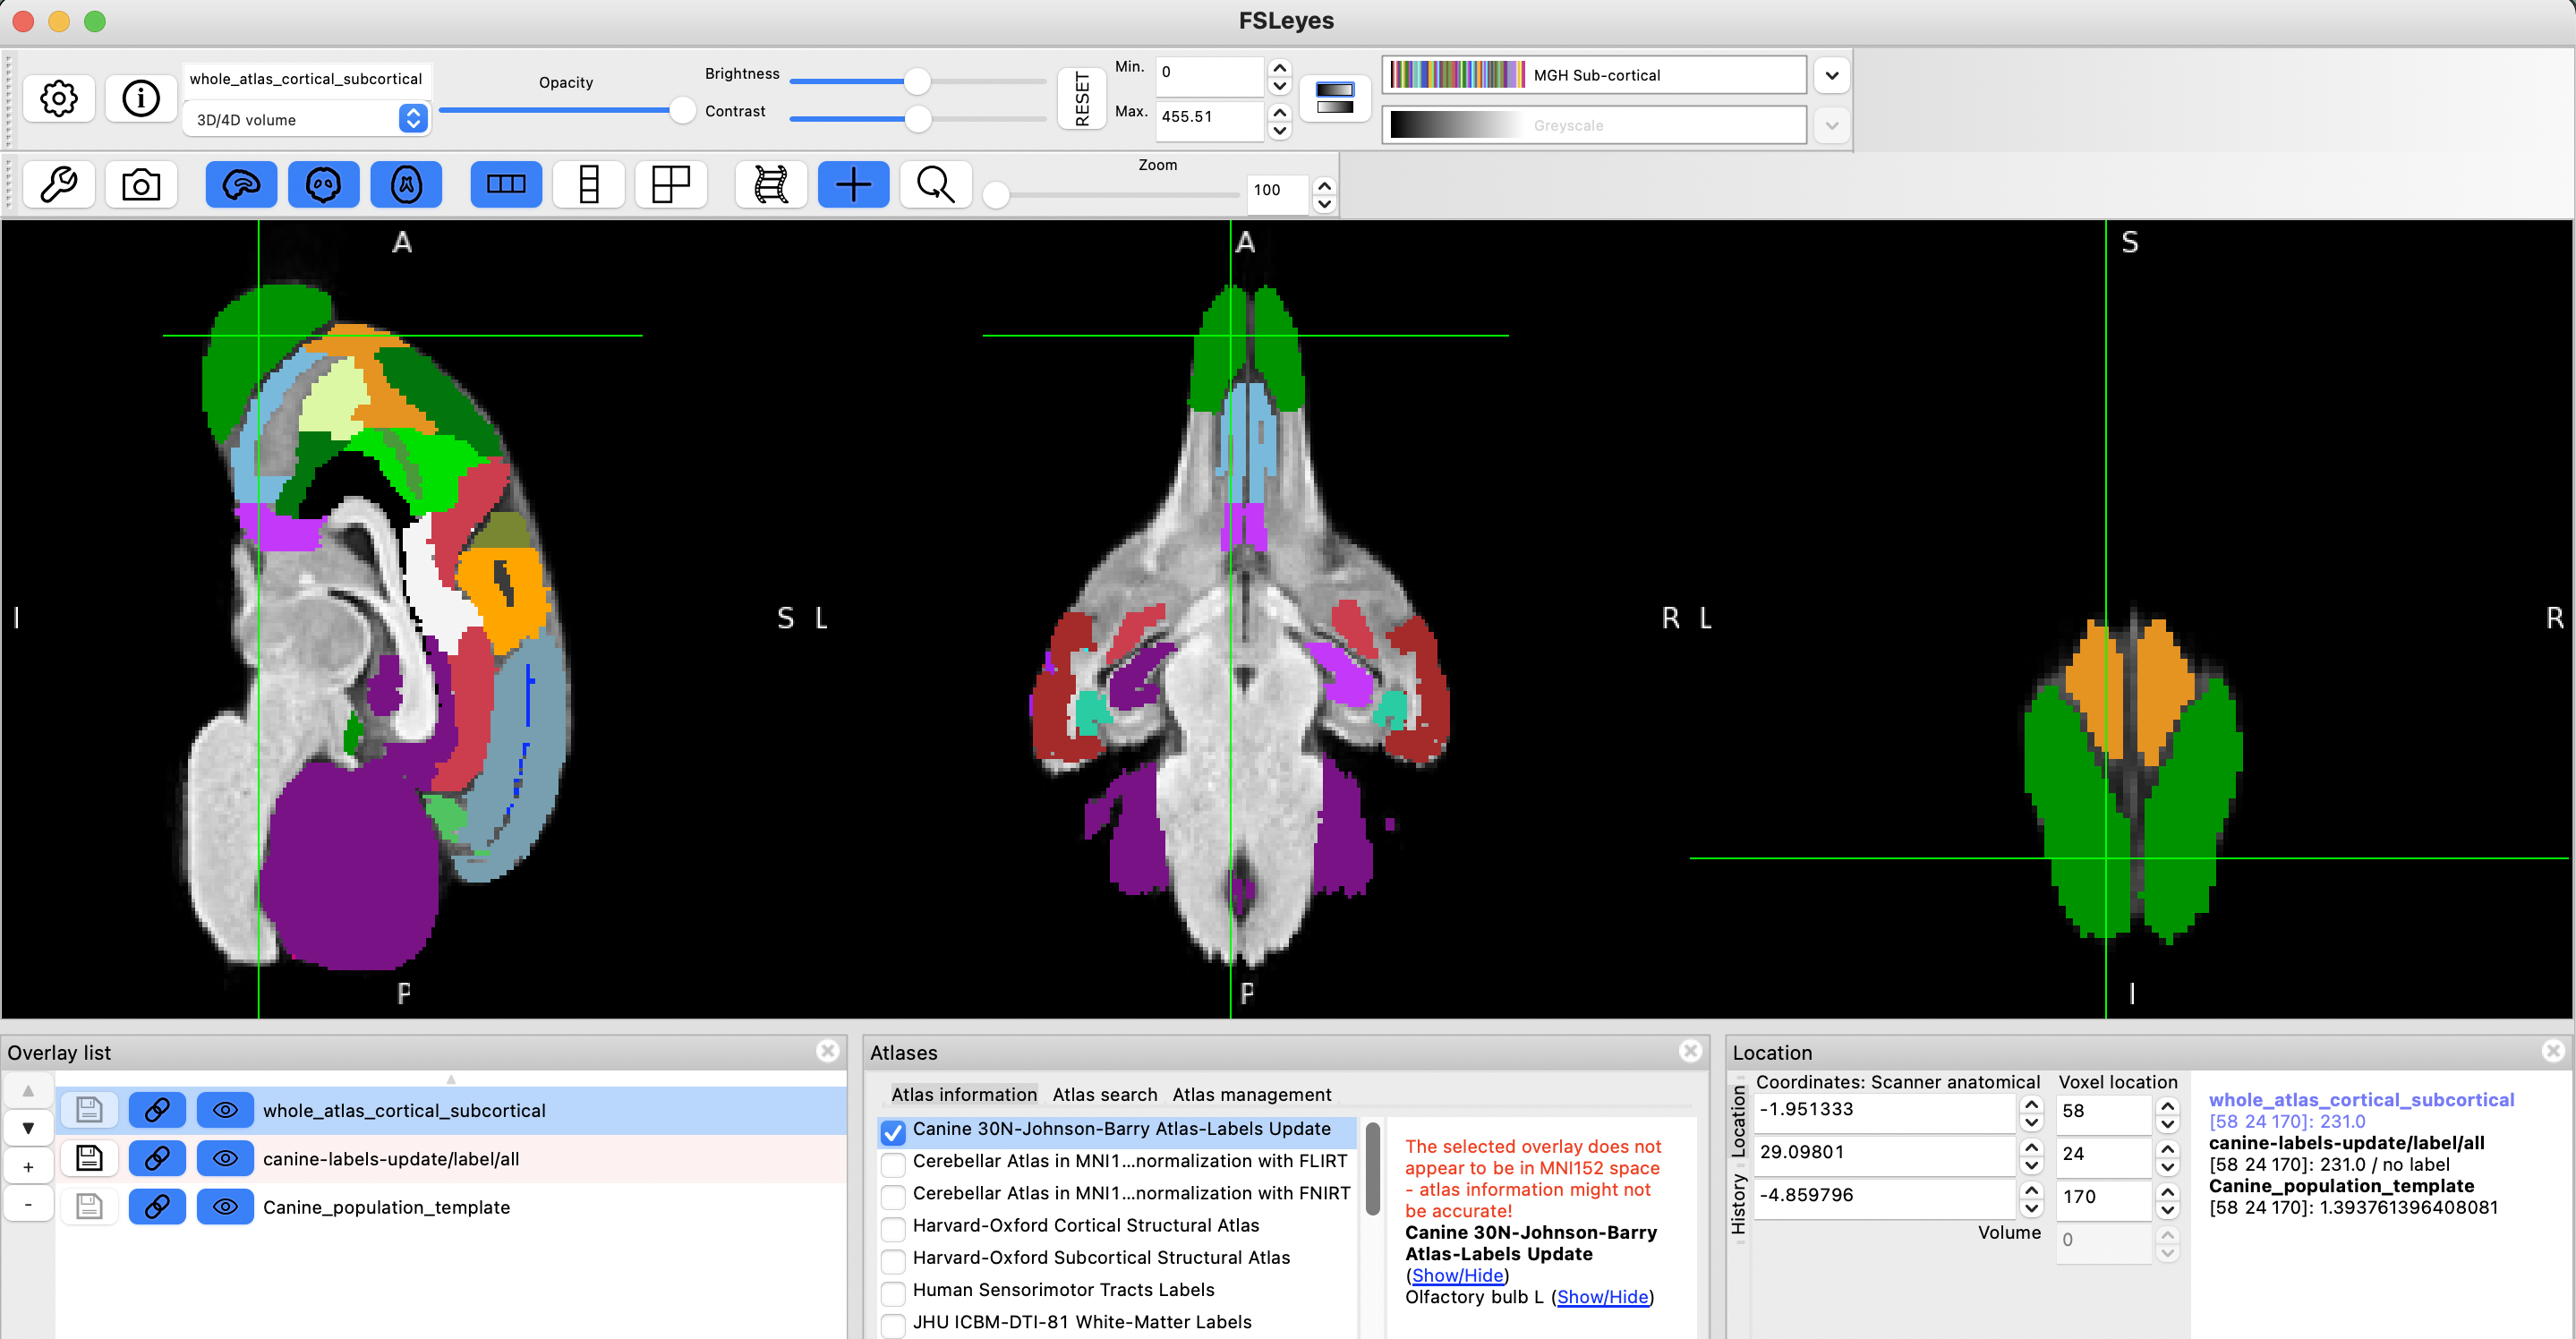
step 14
This should make it easier to navigate between various regions and visualise their boundaries better.
step 15
There is no step 15. Hope everything has worked out. Have fun!
Kindly excuse typos. If anything is unclear, or if you identify an error in this post, feel free to send me a tweet or an email.